

Kneedle Knight
Lead Level Designer | 22 Team Members | Published Title

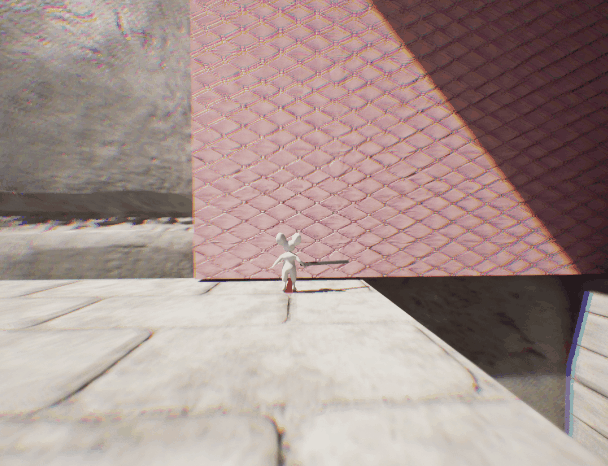
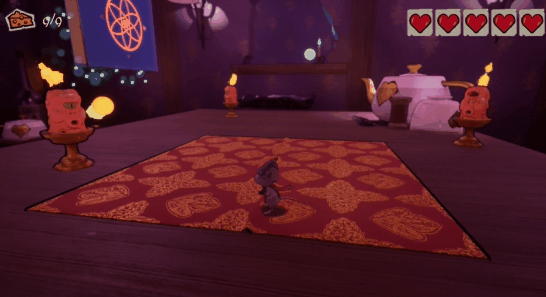
I was the Lead Level Designer on Kneedle Knight - a 3D platformer game for both PC and Steam Deck in which players play as a mouse knight, using a magic needle as their sword to travel through 2D and 3D worlds, sew fabric to create paths, perform special movements, and defeat enemies.
Even as a mouse, the little knight will perform his duty to reach the highest tower and defeat the evil witch of fabric.
My Role: Lead Level Designer
Software: Unreal Engine 5
Team Size: 22 (6 Level Designers)
Development Time: 4 Months
Platform: PC (Steam), Steam Deck
Average Playtime: 3 Main Levels / 1 ~ 1.5 hour
My Contributions
Lead Level Designer
-
Led the level design direction to accomplish the Game Designer's vision.
-
Communicated with the Game Designer, producer, art team, and programmer team to confirm the plan for the game.
-
Communicated with artists and programmers to address level designers' needs and also provide the other team with the necessary information.
-
Followed up with the design team, led the overall design principle, and built a common design language with the team.
-
Constantly playtested and gave feedback to each level designer. Collected feedback from stakeholders and playtesters to plan and form level iteration tasks.

Design Process
Design Process Step 1
Pre-production
Design Process Step 2
The "Sew" Mechanic
Design Process Step 3
Level Design Techniques
Design Process Step 1: Pre-production
The Original Idea - The original idea of Kneedle Knight is to allow the player to travel between 3D and a behind-the-wall "2D" space as a tiny mouse knight and use his magic needle to attack to solve puzzles to overcome challenges to defeat the evil witch.
During the pre-production phase, we prototyped and tested 3 versions of a "2D world." The original behind-the-wall 2D world, a perspective 2D world, and a "player merge into fabrics" 2D world.
My contribution
-
Suggested the idea of "perspective 2D world", and a "player merge into fabrics" 2D world.
-
Created teams for level designers to brainstorm puzzle designs for each version.
-
Analyzed the advantages and disadvantages of each version.
-
Communicated with the lead team to decide which version to move forward.

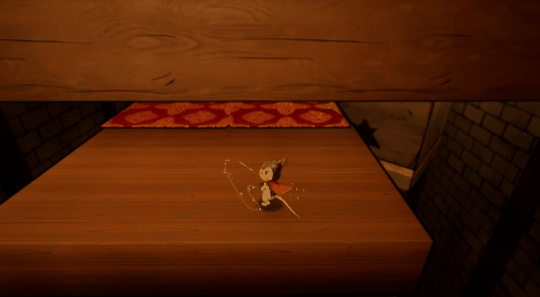
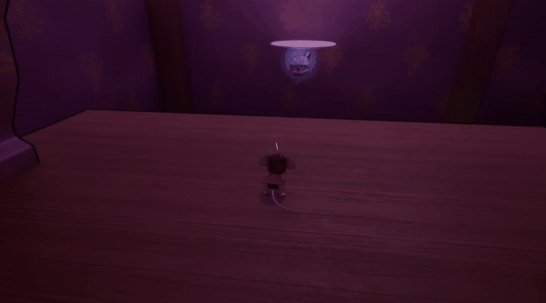
Behind-the-wall 2D World
Perspective 2D World
-
Reuses 3D assets and saves resources for art.
-
Designers found fun in 3D Platforming.
Advantages
-
Challenged a new version of possible 2D gameplay.
-
Potential of creating interesting puzzles.
Advantages
-
Designers found it hard to create depth in the levels.
-
There's nearly no variation in players' abilities between both worlds.
-
The simulated 2D does not offer much unique gameplay.
Disadvantages
-
Requires extra 2D sprite assets for art.
-
Presents design challenges for what can and cannot be traversed in 2D space.
-
It is hard for the design team to imagine and create puzzles inside a room instead of placing everything near walls.
Disadvantages
Player Merge into Fabric 2D World.
After the two previous versions of "2D worlds" were not ideal, we suddenly came up with a new idea.
If a needle is the mouse's weapon, why not let it sew the player into a piece of fabric?
-
Level designers were able to create levels that showcased the "Merge into fabric" mechanic.
-
Level designers brainstormed many unique ideas on possible enhancers and puzzles.
-
Hit a switch to change the direction of the fabric piece to use it to go to different locations.
-
Collect fabric pieces and place them together to build a new path.
-
Advantages
Disadvantages
-
The programmers were challenged when making smooth camera transitions when rounding corners in 2D.
-
Instead of placing fabric ready for the player, how can we let the player decide, thinking about "where should I put the fabric?"
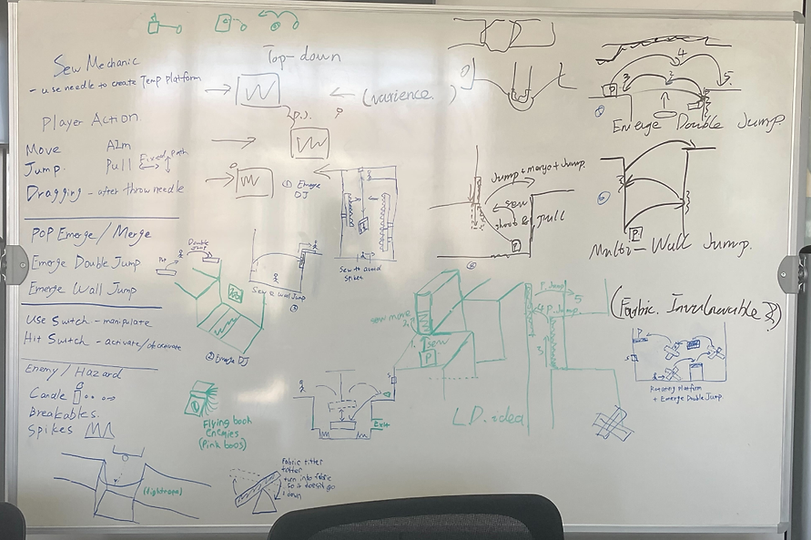
Brainstorm of Possible Puzzles from the Level Design Team
We found the fun that we were striving for with 2D and 3D!
Yet, this was just the beginning of creating a game. What would be the rule when the player moves inside fabric? What's the best way to combine the mergeable fabric with the needle?
What's the best way to let the player control the fabric instead of only using the existing ones?
Design Process Step 2: The "Sew" Mechanic

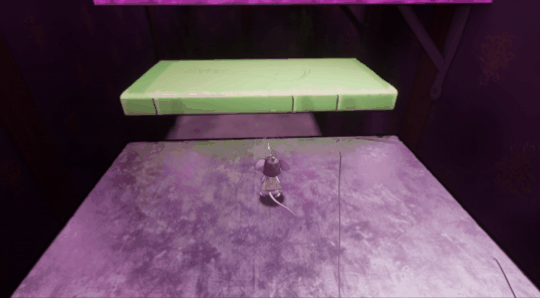
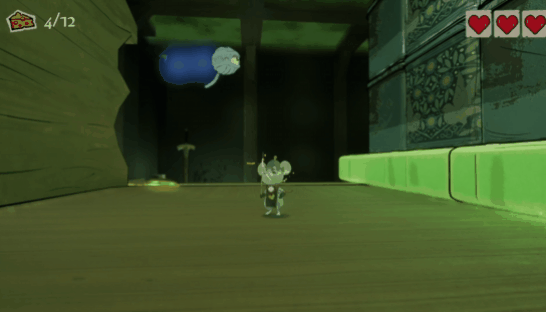
When the player aims and throws the needle, it automatically "sews" a new piece of fabric onto where the needle lands.
Instead of having fabric ready as ladders for the player, it allows the player to interact actively with the world and gives them more freedom to decide how and where to use the fabric.
"Sew" Teaching Moment in Level 1
As an overall level design direction, I directed the level design team to ensure players went through the following phases to learn, use, and master the "Sew" mechanic throughout the entire game.


Merge into Existing Fabric
Sew Fabric to Fill Gaps then Merge into it
Freely Sew and Merge into Fabric to Overcome Challenges
One Mechanic, Multiple Uses
Throughout the game, we designed the levels to let players use the "Sew" mechanic to solve most of the puzzles. We explored the depth of the "Sew" mechanic and slowly prepared the player to use it to achieve various actions.
"Sew" to Double Jump
"Sew" to Avoid Attack

"Sew" to Create New Path
"Sew" to Go Past Obstacles
Smooth Skill Progression Throughout the Game
The difficulty curve rises not only in each level from beginning to end but also entirely from the first to the last level. I wanted to give players enough time to familiarize themselves with each skill taught by repeating its use, then ask them to combine this new skill with what they have learned. To achieve that,
-
We listed all the skills we were using or might be using in the future of the development as a skill progression chart.
-
Asked the designers to fill out the skill progression chart to know:
-
Skills they need to learn
-
Skills they need to use (taught by the previous level) constantly
-
A general idea of how difficult the level needs to be.
-

= Not Featured
= Easy
= Medium
= Hard

Level 1
Sew to move up.
then
Jump on a statinary Yarnball
Level 2
Sew to double jump
and land
on a statinary Yarnball
Level 3
Sew to double jump
and time landing
on a
Yarnball
Patrolling
Throughout the design and iteration process, I generally communicated with each team, organized information, and passed it on to the next level's design team. In addition to playtesting and giving feedback, I organized brainstorming sessions to support them in generating various design ideas.
We also encouraged the design team to playtest each other's levels at the beginning of each milestone to get feedback, feel the difficulty of other levels, and then organized a design review to discuss potential design changes to achieve a smoother difficulty curve for the entire game.

(The lessons I learned are in the postmortem section below)
Design Process Step 3: Level Design Techniques
With the concept of "a small mouse inside a human-sized world," it is important but challenging to communicate to the player where to go. We mainly used color saturation, breadcrumbs, and leading lines to guide players towards the correct direction.
Color Saturation
When the team first put the levels together, the entire space was bright and flat, which led to a lot of playtesters' confusion about "where should I go next?" After discussing with the art and design team, we decided to darken the entire space, only light up the critical paths to catch players' attention, and use high-saturation color books to guide players.

Everything was in the same tone and hard to differentiate.
Breadcrumbs
We mainly used candles, crystals, and books to create a series of breadcrumbs to lead the player to their next goal.

Candles lead the player to the exit gate.
Leading Lines
I also paid attention to which direction each decoration prop faced. We used them to create leading lines that drew players' eyes in the correct direction.

Placement of candles, books, and teapot spout all lead towards the hole in the wall.
Gallery

Level 1 Blockout
Postmortem
What Went Well
-
I didn't hesitate to give advice and voice my disagreements.
-
During the early milestones, proof of concept technology (POCT), our game designer decided to remove melee attacks from the game because "aim and throw the needle to attack" is a more generally used action. I brought up my disagreement to the table as an open discussion, suggesting that we should keep the melee attack as a choice that is always there for the player and reduce the stress of "having to step back to aim and throw even if the enemy is next to me."
-
My suggestion was accepted, and we ended up receiving positive feedback for the melee attack. Players loved the speedy feeling of it compared to the throw.
-
-
I actively communicated with other leads about designers' needs.
-
Throughout the development process, I often asked each level's design team what special enhancers and assets they needed to complete the level. I listed all the demands and checked their progress with the other leads to update designers on what they'll get from programmers and artists each day. It prevented the levels' building process from being blocked by unestablished mechanics.
-
I also sat down with the art lead to discuss and decide which assets would be made after the team filled out the assets request sheet. To ensure it was in scope and satisfied the level designers' needs, we reviewed each level's block out and called each team to discuss the parts we were unsure about or might need to be adjusted.
-
-
I let each designer shine.
-
Before the development started, I reviewed all the designers' portfolios and learned what they were passionate about. Also, before separating designers into different teams, I always asked what they wished to do. I asked the most detail-oriented designer to adjust the player controller, and in late milestones, we never received any negative feedback on the controller.
-
What Went Wrong
-
Lack of follow-up on unsolved issues.
-
There was a period when we kept receiving negative feedback on checkpoints, and players would often die and be respawned way before where they were when they died. However, the same issue was reported again after I asked the designers to add more checkpoints. I didn't follow up with the producers about this issue, so the designers kept getting requests to put more checkpoints, even though they've reported there is a bug that caused checkpoints to sometimes not work. A designer finally raised this issue in the daily meeting, and that's when I knew what might have been going wrong with the checkpoints.
-
We asked all designers to take screenshots of where their checkpoints were and test them to confirm the issue was still occurring. It ended up being a mix of both: yes, there is a programming bug, and yes, in some sections of the level, the designers didn't put enough checkpoints. It taught me that it's important to keep a list of any issues designers encounter and check with any related person daily to ensure they are handled.
-
-
I only requested changes verbally instead of recording them as tasks.
-
When I started to playtest levels and give feedback, I would only tell the designer what to change. However, I quickly realized that with all the level-related stuff that the designers needed to complete, those changes were easy to get lost in the iteration process. Since then, I have pushed myself to write down all the changes I wanted to suggest and assigned them as tasks to each designer. It not only helped the design team to track issues but also saved me time to know if a design change was done and ready for me to review.
-
-
I didn't suggest geo changes in the early stage.
-
With our short development time, I tried to avoid suggesting massive geometry changes to each level, but what I didn't ask the design team to solve eventually bit us in the back during the later milestones. It is essential not to hesitate to discuss a critical change with the team, even if it might be something they don't want to do.
-
When level 3's blockout was initially created, we realized the space in the first part might be too tight compared to its complexity, but we decided to hold off to see if a massive change was needed. After all the art assets were placed, nearly all the players got lost in the first part of level 3 because of its narrowness and complexity. The cost of changing its geometry was now much higher compared to changing it during the block mesh milestone. We had to set up a meeting with the designers to discuss the most cost-effective way to make it play better.
-
What I Learned
-
Repeat important things multiple times.
-
It is never too repetitive to repeat important information multiple times. When we first got the mergeable fabric set from the artists and programmers, we got 2 sets of fabric that looked the same, but only one was functional. I made an announcement in the daily meeting and sent a screenshot inside the team chat, notifying everyone where to find the correct fabric. But later on, designers were either asking where to find the fabric or using the wrong set of fabric, which was discovered later because they were not functional inside the build. I've learned that it never hurts to repeat and emphasize important things.
-
-
Suggest changes to the team and discuss the final result.
-
The more I playtested and gave feedback, the more I realized that instead of telling, it is better to suggest changes to the designer and always add an extra sentence to ask them, "Please feel free to discuss with me if you have questions." Since I started to do so, designers came to me more often to share their thoughts on improving the design, and their talent usually offers brilliant solutions.
-
-
Never ignore any designer's advice.
-
Recording and considering everyone's advice on the game does no harm; it only benefits either the team or the development of the game. Someone might know something the lead team was unfamiliar with and could offer their abilities to improve the game.
-
When we had our first draft of the player controller, one of the designers came to me and proposed many details that could be added to make it feel better. He is a fan of platforming games and has experience in developing a platform game controller. I asked the game designer to meet with him to discuss the details, and with his help, the second version of our controller felt much smoother compared to the one before.
-